Daylight Block Clock at EMF 2026
Electromagnetic Field is a hacker camp that takes place every two years, near Ledbury in Herefordshire in the UK. This was the third EMF I have been to, but the first where I have been a part of the official proceedings - with an art installation. I brought my Daylight Block Clock, which was on display in the Lounge at EMF in the “clock corner”.
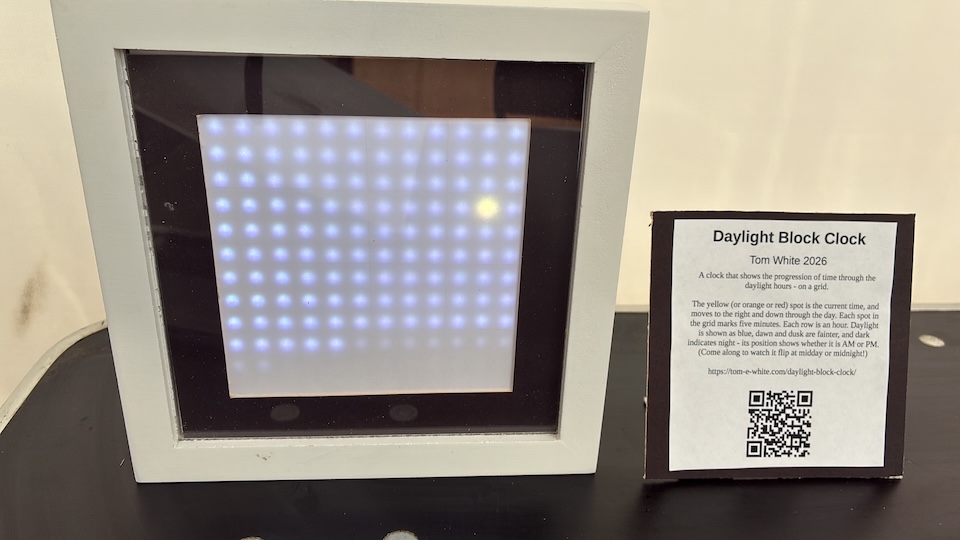
The caption reads:
A clock that shows the progression of time through the daylight hours - on a grid.
The yellow (or orange or red) spot is the current time, and moves to the right and down through the day. Each spot in the grid marks five minutes. Each row is an hour. Daylight is shown as blue, dawn and dusk are fainter, and dark indicates night - its position shows whether it is AM or PM. (Come along to watch it flip at midday or midnight!)
This particular incarnation has been sitting in my kitchen for a couple of years now, but the original idea goes back to 2002, when I created a web page to display a block clock as a way of showing the rough time on a grid:
I also liked the idea of superimposing the hours of daylight on the clock, so you can see when sunrise or sunset occurs:
I didn’t use this clock much, probably because it was web-only, so it wasn’t easy to keep to hand. The last thing you want to do when you want to know the time is open a web page!
About a decade later, when I was living in San Francisco I built a LED version, controlled by an Arduino. It used a matrix of red LEDs, which of course didn’t allow the daylight hours to be included on the display. (I gave this clock to a friend before coming home to the UK.)
(I think I also wrote a version that ran on a Chumby!)
The idea of a block clock as a physical time piece didn’t go away though, and after my friend Mike Olson built his A Solar Metric Clock (and gave one to me!) a few years ago, I thought about building another block clock.
By this time multicolour LED matrices were cheaply available, so I could use different colours on the display. I used a Raspberry Pi Pico as the controller - smaller and cheaper than the Arduino. Crucially it also had wifi, which meant getting the current time was simpler. (I didn’t bother with a hardware clock, as it can just sync with NTP once every day.)
I also found a picture frame that the display fitted nicely in, which made the build very straightforward.
When visitors came round they would often comment on the clock, asking what it was, since it’s not obvious that it is a clock. That’s one thing I like about it - there are no numbers or letters on it - so it can function equally well as a piece of art.
When I first conceived of a block clock, I though I might use it to see what the approximate time is (to the nearest 5 minutes). But I’ve noticed that I don’t really do that. What it is useful for is seeing approximately how much daylight there is left. Which is why I call this version the “daylight block clock”.
Getting it set up at EMF was a bit of a fiddle. Since it doesn’t have a hardware clock, it needs wifi to get the time when it first powers up. Before I left home I prepared a settings file with the EMF wifi credentials in it, but they didn’t work when I got on site. I also managed to forget the USB A to USB C cable I needed to connect my laptop to the Pico, so I could update it. Luckily my friend Adam had the right cable, so I could get it working in a very hot tent on the Thursday before everything started. (I had to connect to the emf-open network in the end.)
I you are interested in building one yourself, there are some build instructions here.